Bhadre's Solenoid/Relay Controller
Bhadre's Solenoid/Relay controller can be used to control solenoids and relays either automatically or manualy or by using a smart phone or computer from remote or using Google Home and Amazon Alexa. The coils of the solenoid or relay must have a rating of 12VDC and a maximum of 700ma. For controlling solenoids and relays of different rating than this, you can use two relays with one relay cabled to another as described later in this document. The controller needs WiFi access. Once cabled, automatic controls can be configured as described in the sections below.
If you are using AC solenoids, you can use Bhadre's touch panel switches and sockets. Refer to Bhadre's Switches and Power Sockets
This document explains how these solenoid/relay controller can be installed and configured to meet your needs.
1 Solenoid/Relay Controller
Solenoid/Relay controllder needs WiFi. This also needs a 12V power adapter. It is to be cabled to your solenoid or relay.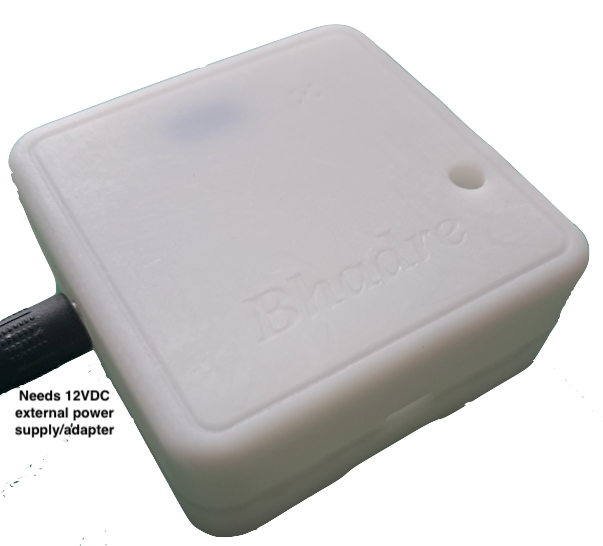
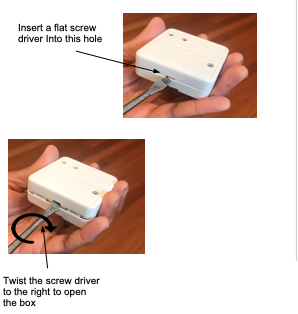
In the next section, we will describe how this controller can be installed for controlling any solenoid. Before we get to it, have a look at the inside of the controller and its various connectors and cables. The controller can be opened by inserting a flat screw driver in the side hole of its plastic box and twisting it. Use a correct flat screw driver that has a flat end approximately as wide as the side hole on the box. Insert it slightly and twist open. You need to apply some force when twisting. You will hear a cracking sound when the latch comes out and the box opens. That sound is normal. The only time that you need to open the box is when you install it and do the cabling.
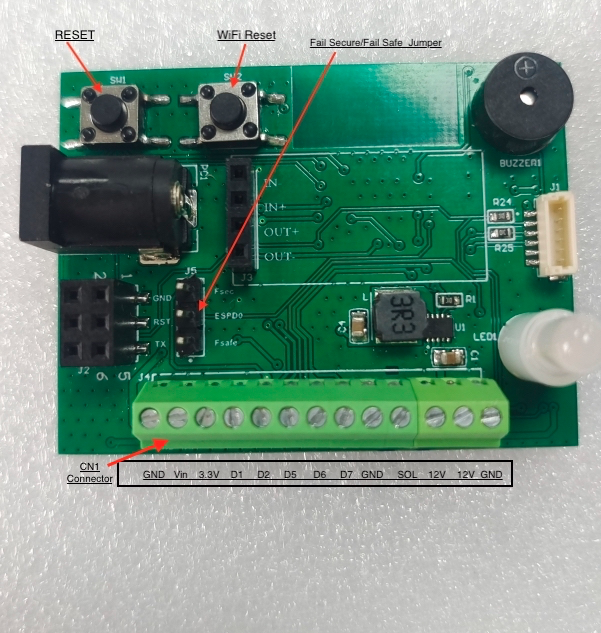
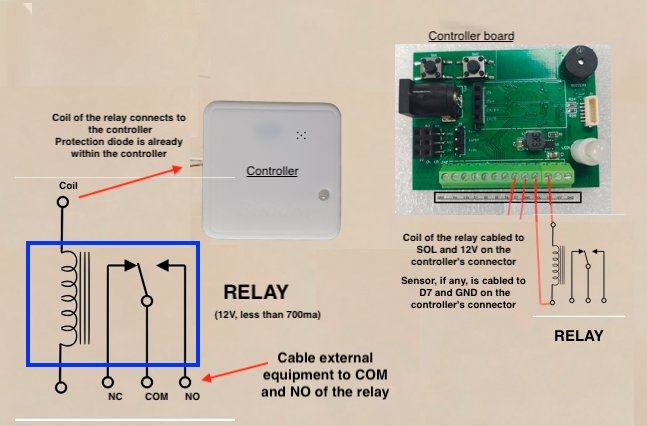
Pictures below show all the connectors and the labels on each connector. These will help when cabling and installing the controller.
2 Cabling to a solenoid
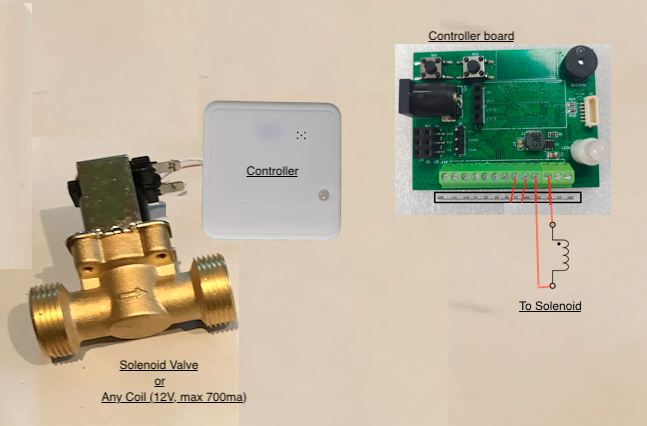
This controller can also be used in automation systems where a solenoid is to be controlled. The solenoid can be that of an irrigation system, for example. This can also be used to operate any relays by cabling to the coil of that relay. The specification of the solenoid or any coil must be such that its voltage rating is 12V and its current rating is less than 700ma.If your solenoid is higher rated than this, you will have to use an external relay and external power supply, and cable the coil of that relay as shown below to the controller as explained in the next section.
3 Cabling to a relay
This controller can also be used in automation systems where a relay is to be controlled. With a relay, you can control any electrical equipments. Connect COM and NO of the relay to any electrical equipment. The specification of the coil of the relay must be such that its voltage rating is 12V and its current rating is less than 700ma.If your relay is higher rated than this, you can use two relays in series, one connected to the controllere, and the other higher power relay's coil cabled to the NO and COM of the first relay. Use an external external power suoply, if needed.
4 Initial Setup and Common Configurations
In order to use this controller, it needs some initial minimum configuration. These initial configurations are common to most of the devices of Bhadre. Click here to see the instructions on doing the initial configurations of these switches and sock5 Configuring Scheduled Actions or Additional Automatic Controls
This controller and mostly all the controllers from Bhadre have powerful features to configure automatic controls either scheduled periodic, based on sensors or other events on any other remote devices.
Refer to Configuring Automatic Controls to configure automatic controls as well as scheduled actions. Some of the automatic conytrols th at you can configure are turnong on/off switch automatically regularly at some time of a day or a week, or when a sensor detects an event at a remote location.